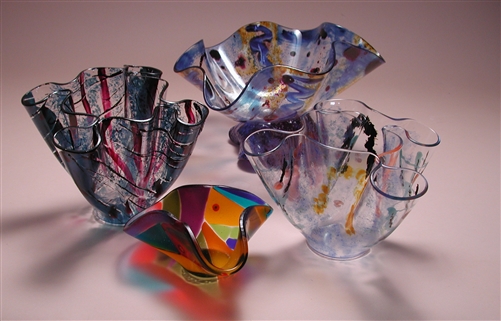
Glass slumping, an enchanting art form that transforms flat glass into beautiful, three-dimensional objects, can be mastered from the comfort of your home. It involves heating glass in a kiln until it becomes pliable enough to mold into a desired shape, often using a pre-formed mold. This creative process not only provides artistic satisfaction but also results in unique pieces of art that can enhance any space. However, to achieve successful results, understanding the foundational techniques and having the right tools is essential. Whether you’re a beginner or looking to refine your skills, this guide will help you navigate the basics of glass slumping effectively.
Understanding the Glass Slumping Process
Glass slumping consists of several stages, each crucial to the final outcome. The key steps include:
- Preparation: Choose the right type of glass and mold. Ensure the glass is clean and the mold is coated with kiln wash to prevent sticking.
- Heating: Gradually increase the kiln temperature to allow the glass to slowly become pliable without breaking. This stage requires careful monitoring.
- Forming: As the glass reaches the desired temperature, it will begin to slump over the mold. This is where the magic happens, as the glass takes shape.
- Cooling: Slowly cool the glass to avoid thermal shock, which can cause cracking. The cooling process is as critical as the heating phase.
For a comprehensive understanding of each stage, discover expert strategies here.
Essential Tools and Materials
Equipping your home workshop with the right tools and materials is vital for successful glass slumping:
- Glass: The selection depends on the project. Fusable glass is recommended for beginners due to its compatibility.
- Kiln: A reliable kiln with precise temperature control is essential. Consider size and power requirements based on your workspace.
- Molds: Available in various materials such as ceramic or stainless steel, molds determine the final shape of your glass.
- Safety Gear: Include heat-resistant gloves, protective eyewear, and an apron to ensure safe handling of materials.
To dive deeper into the necessary equipment, find out more about this approach.
Tips for Beginners
Starting with glass slumping can be daunting, but with a few tips, the learning curve can be smoother:
- Start Simple: Begin with basic shapes and gradually progress to more complex designs as confidence grows.
- Experiment: Don’t hesitate to try different glass types and mold shapes to discover what works best for your style.
- Patience is Key: Take time to understand how your kiln works and how different temperatures affect the glass.
For more detailed advice, explore advanced guides and tips.
Common Challenges and Solutions
Even experienced artists face challenges in glass slumping. Here are some common issues and their solutions:
- Cracks in Glass: Often caused by rapid temperature changes. Ensure gradual heating and cooling to prevent stress fractures.
- Sticking to Mold: Inadequate kiln wash application can lead to glass sticking. Ensure even, thorough application before slumping.
- Uneven Slumping: Can result from uneven heating. Verify kiln elements for consistent heat distribution.
Learn about our tailored solutions to address these common challenges.
Mastering the art of glass slumping at home is an enriching journey that combines creativity with technical skill. By understanding the process, equipping yourself with the right tools, and practicing patience and experimentation, you can create stunning glass art pieces. As you explore this fascinating craft, remember that each project is a stepping stone towards honing your skills and achieving artistic mastery.